Test Stand

Completed Test Stand
Development

Test Stand Frame
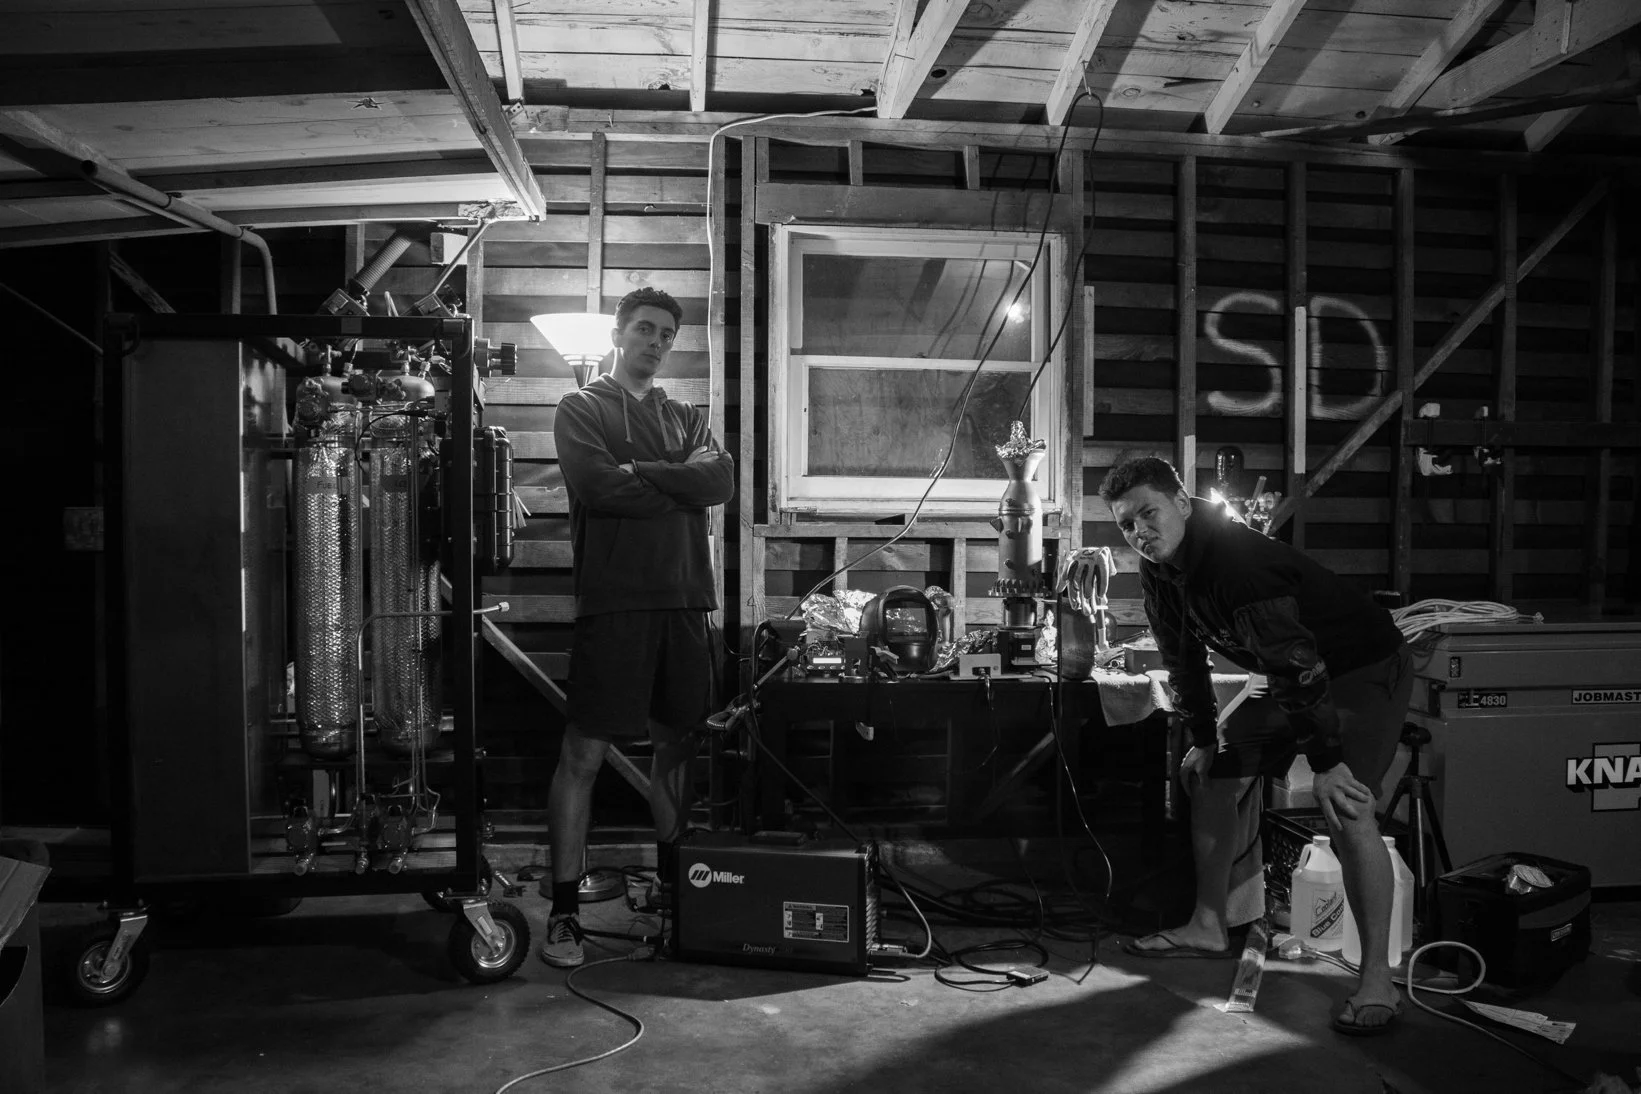
In my garage at home, I personally manufactured the test stand I designed. With its casters, it stands 60 inches tall, 28 inches wide, and 34 inches long. The frame shown above provides the structure for most of the components within the test stand.

Tank Dome Manufacturing
At the shop where I worked, I made custom 304 stainless steel tank domes by welding fittings for pressurization, fluids, and data acquisition. All my welds were done according to pipe welding standards and have a safety factor of 2.5.
Picture shown is tank dome with 1 fitting welded prior to the two additional ones added

Tank Welding
I welded the 2 stainless steel tanks in my garage, according to the TIG welding pipe standard with a method called “walking the cup”.
Hydro Testing Tanks
In my back yard, I used a pressure washer to hydrotest the tanks that I manufactured. During this process, I made sure to take the proper safety precautions and completely bleed the system of any air.
Picture shown is the tank prior to testing where all air was bled from system.
The intended Hydrotest pressure was 2250 psi, however due to how quickly pressure washers pressurize, the tanks experienced 3000 psi for 30+ minutes.
Passed 3000 PSI Hydrotest

Tank Mounting
Mounting of insulated tanks on test stand frame

Assembling Fluids System
I installed the fluids system using SS JIC fittings with copper ferrules. During this time, pneumatic ball valve actuators and the electric pressurization valves were mounted.
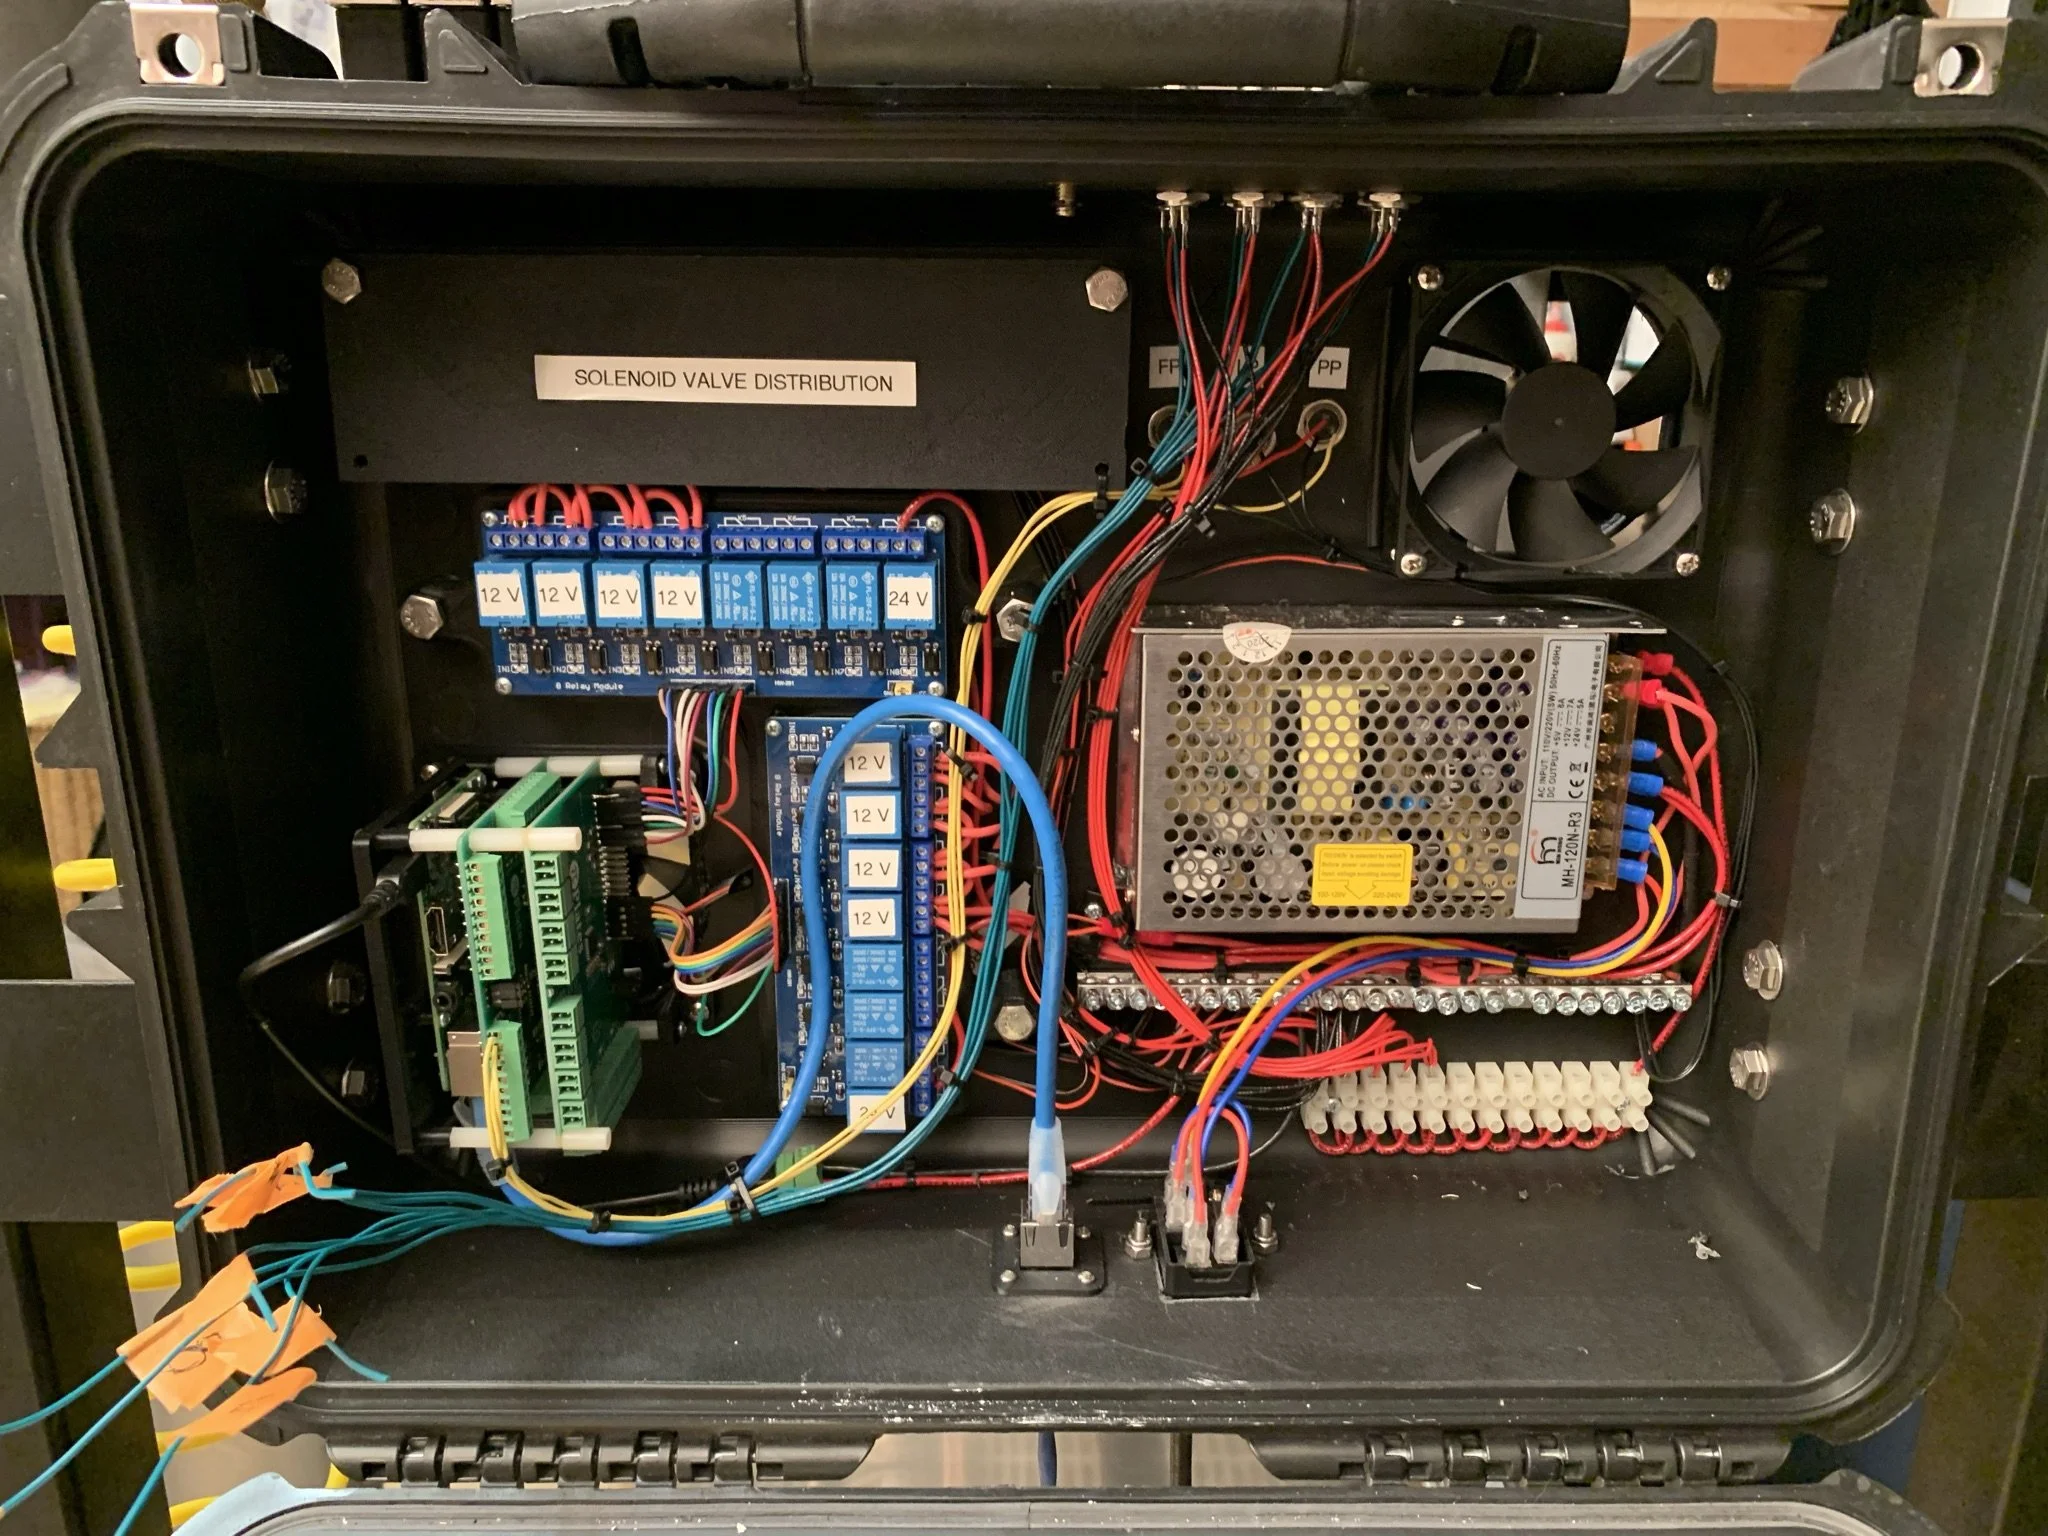
Electronics
The electronics that power this test stand utilize a Raspberry Pi 4 that exploits 2 DAQ Pi Plates.
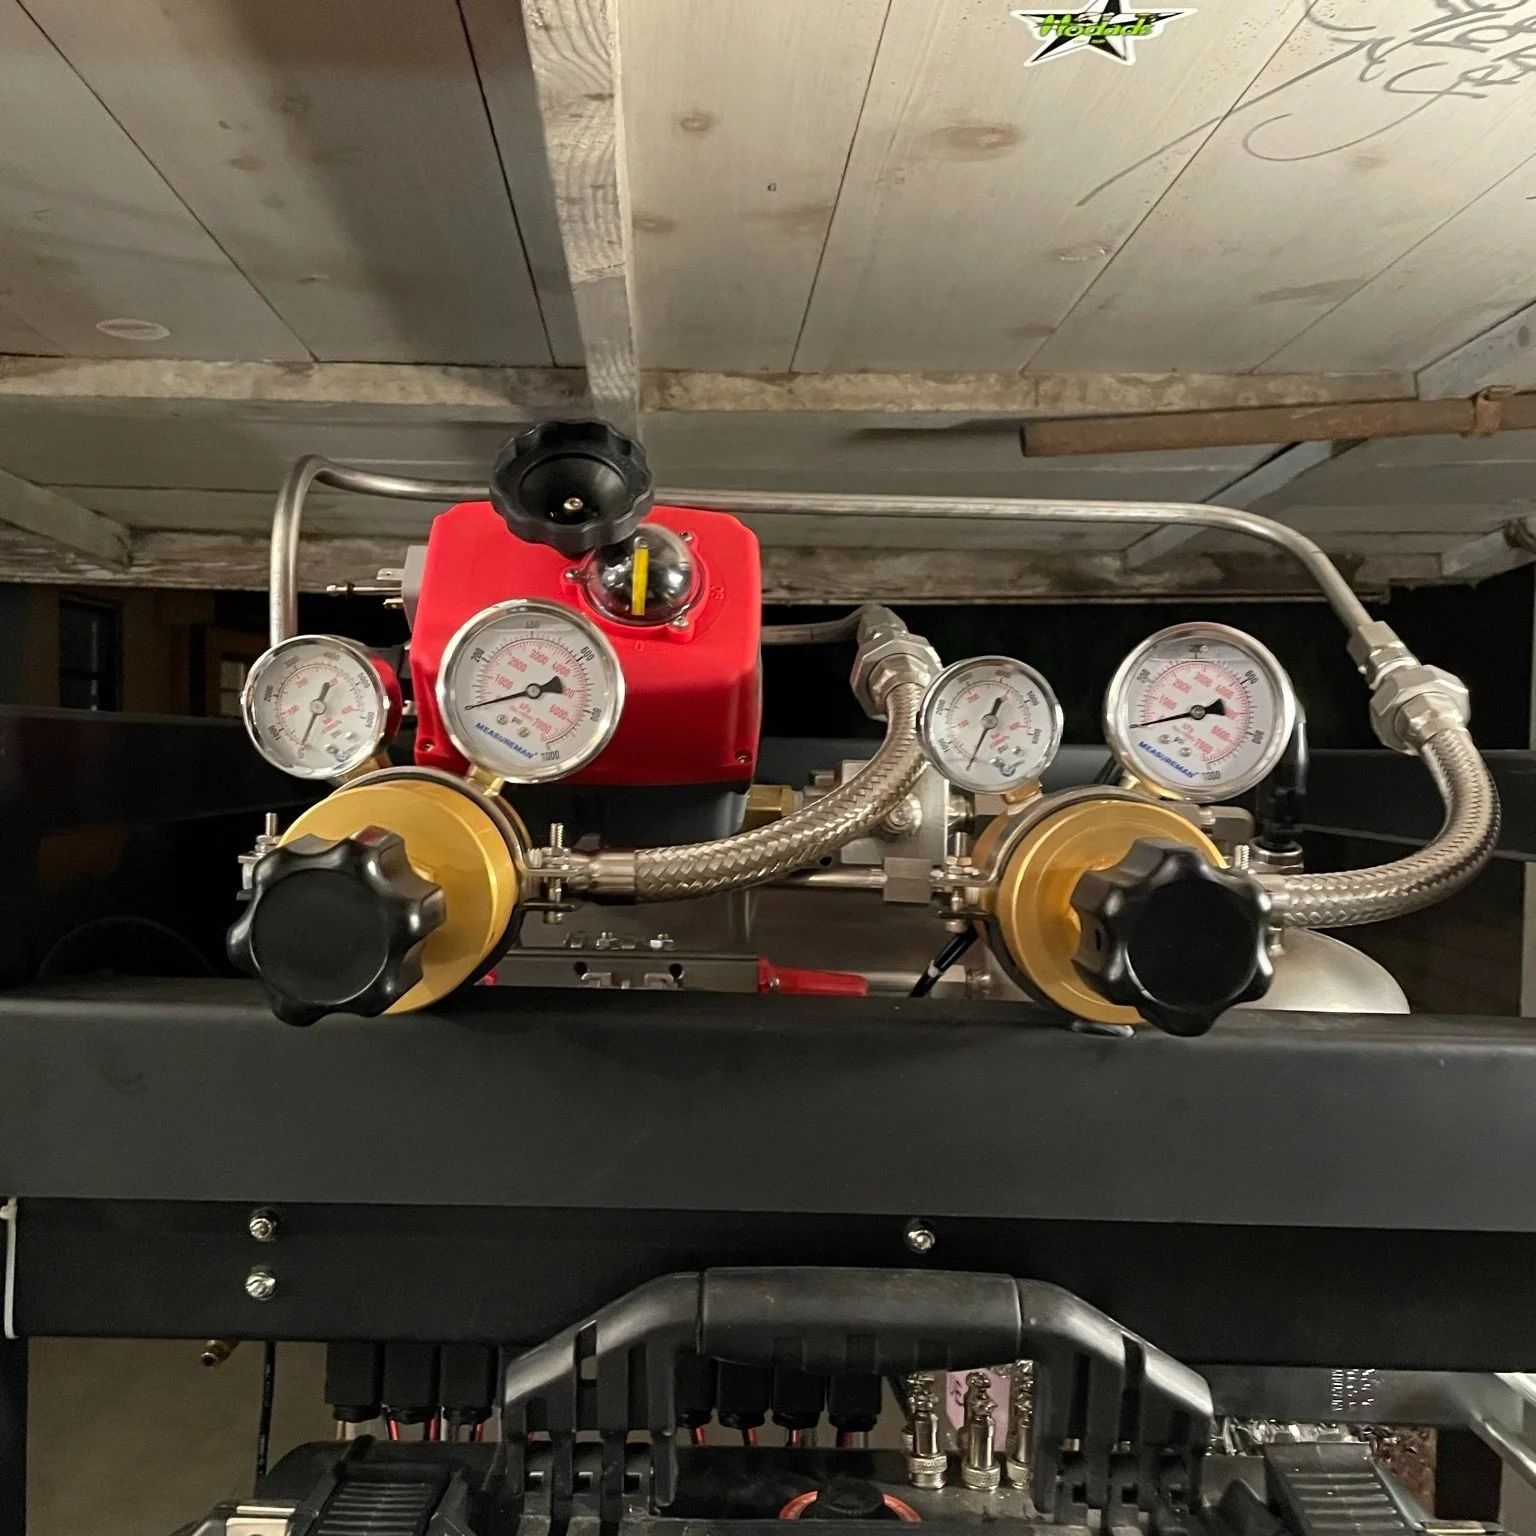
High Pressure Lines
This was the final part of the test stand assembly connecting the high pressure K bottles to the regulators.
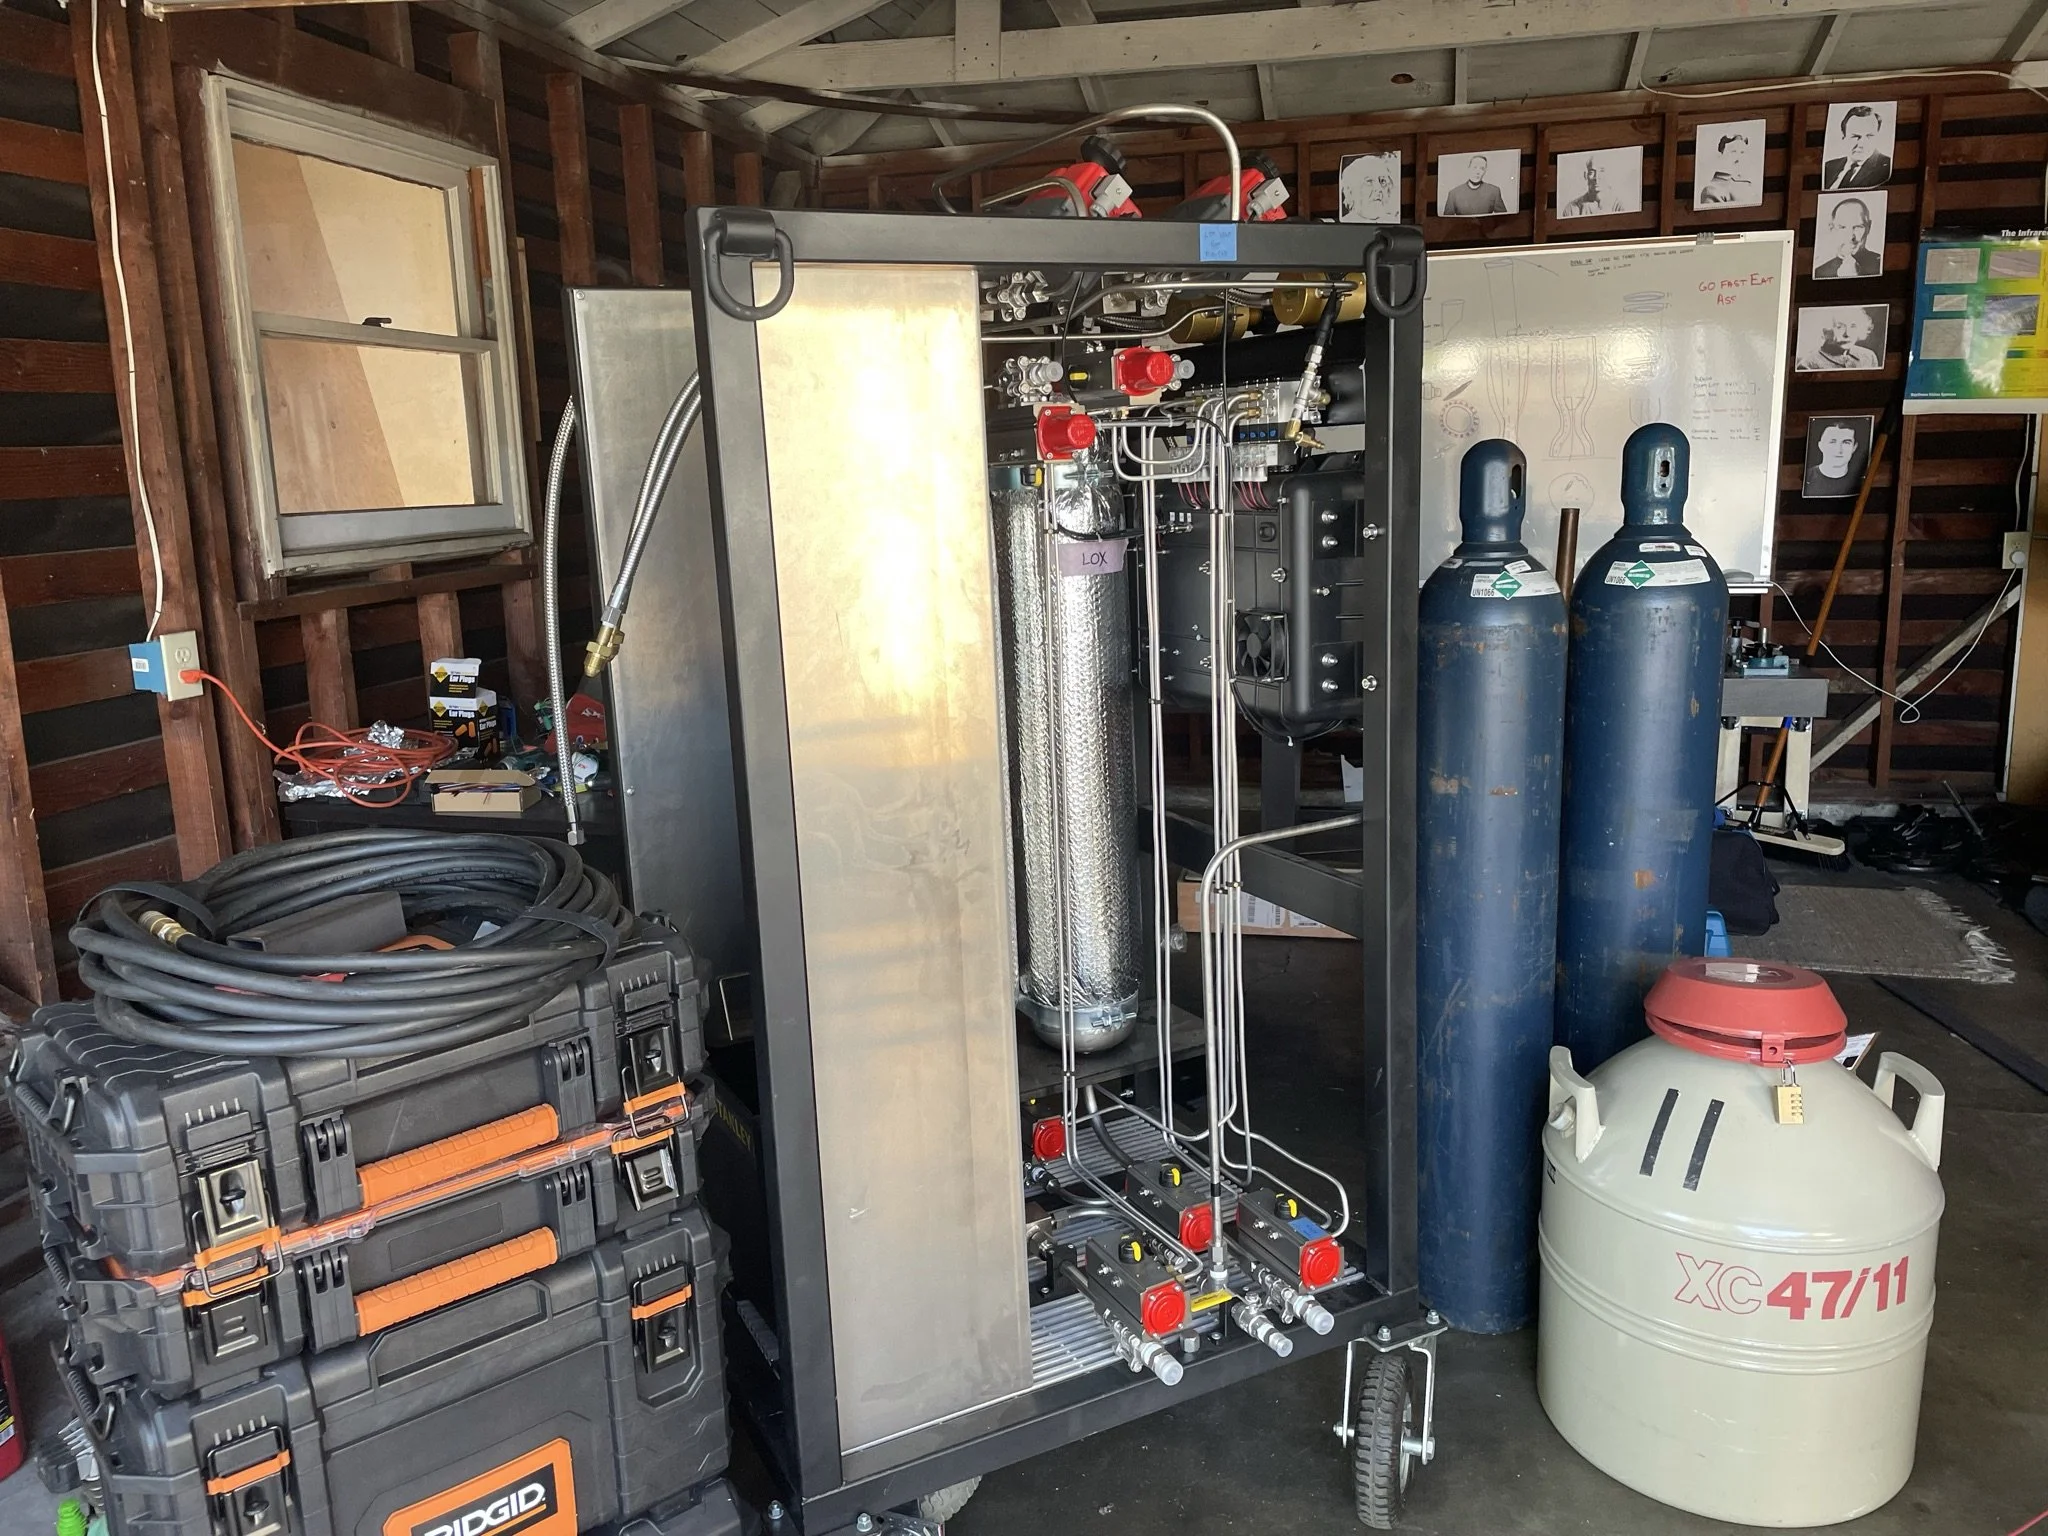
COMPLETED TEST STAND
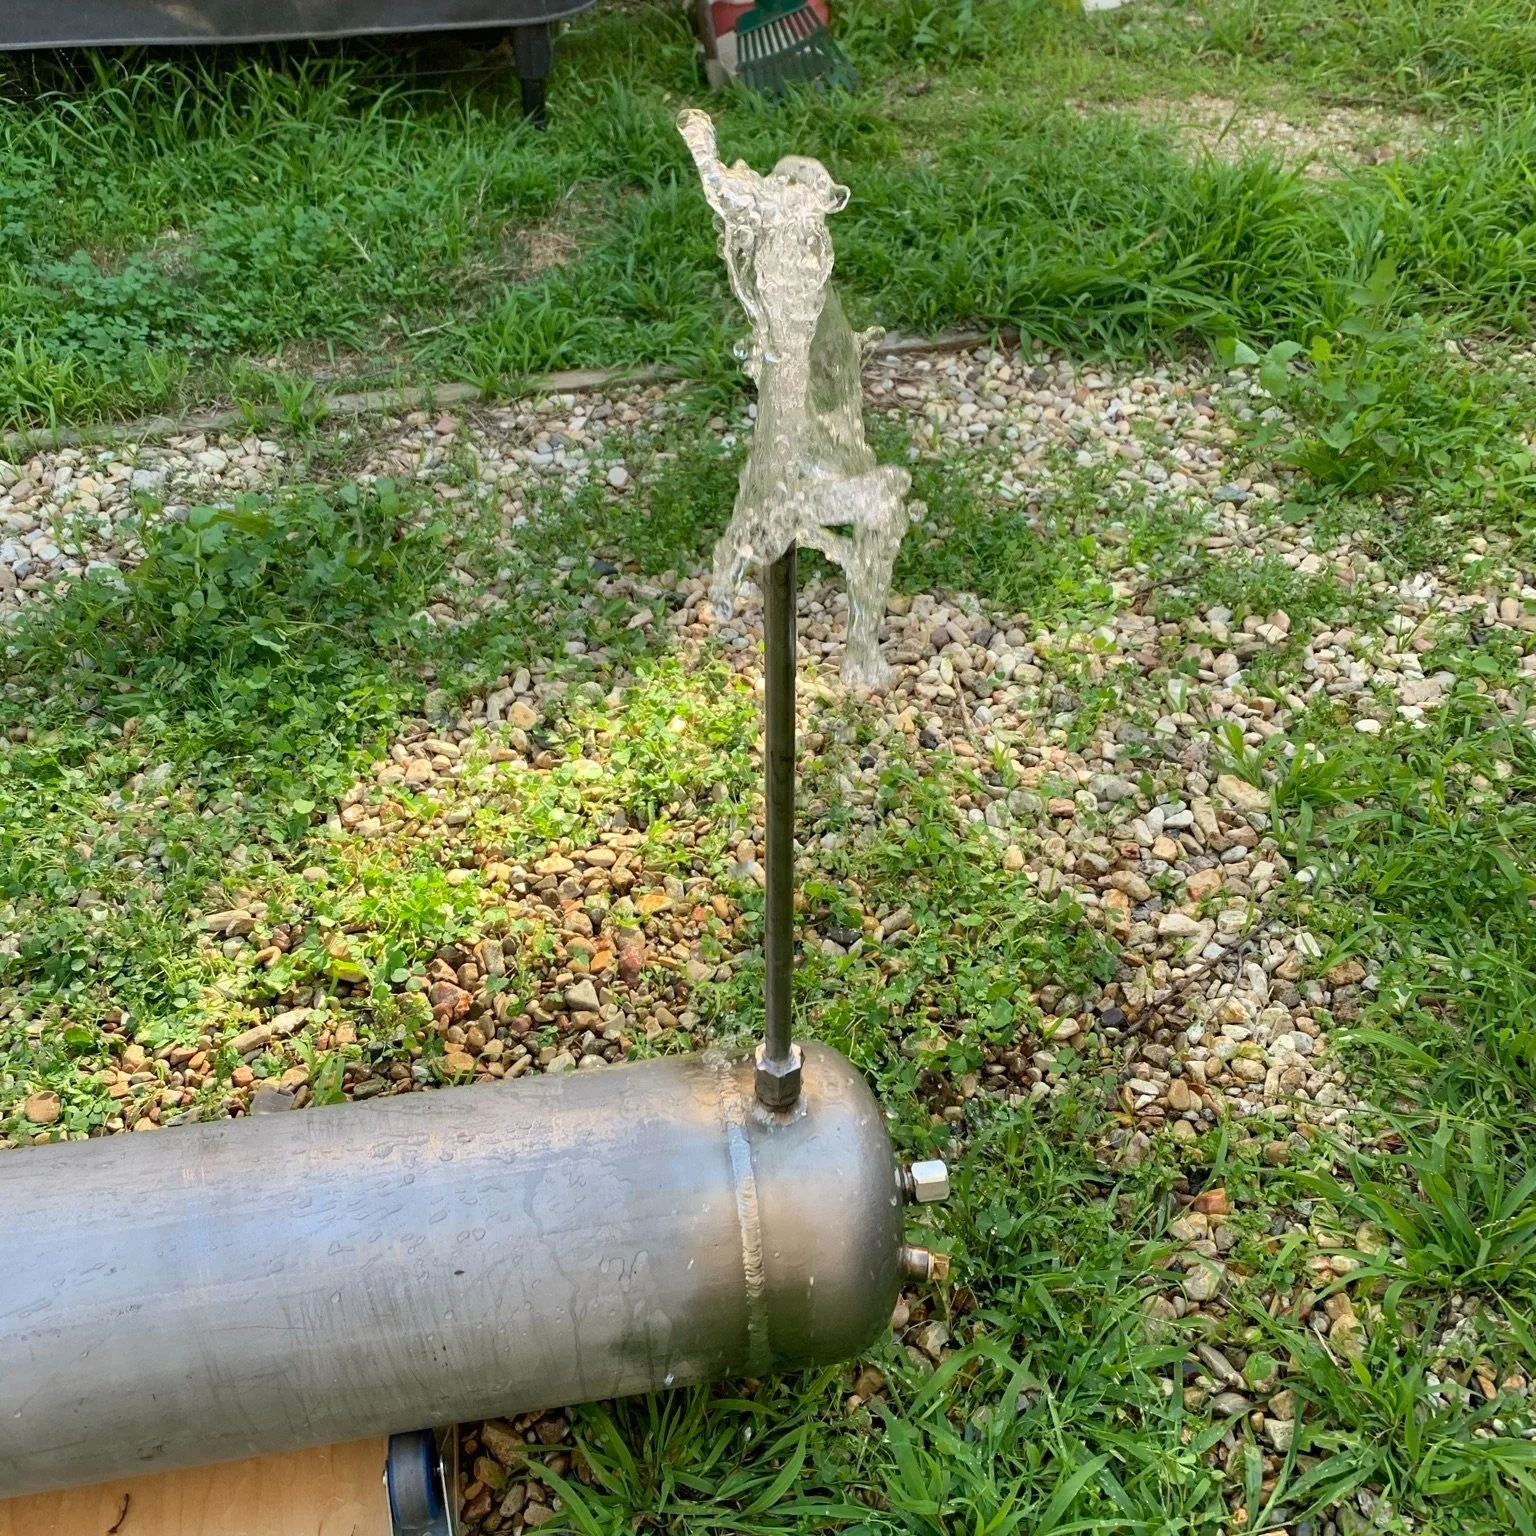
Water Flow Test
This was the test stand’s first attempt at a water flow test and it was successful. In this system test, I pressurized the system to full operating pressure and underwent a full static hot fire scenario.